
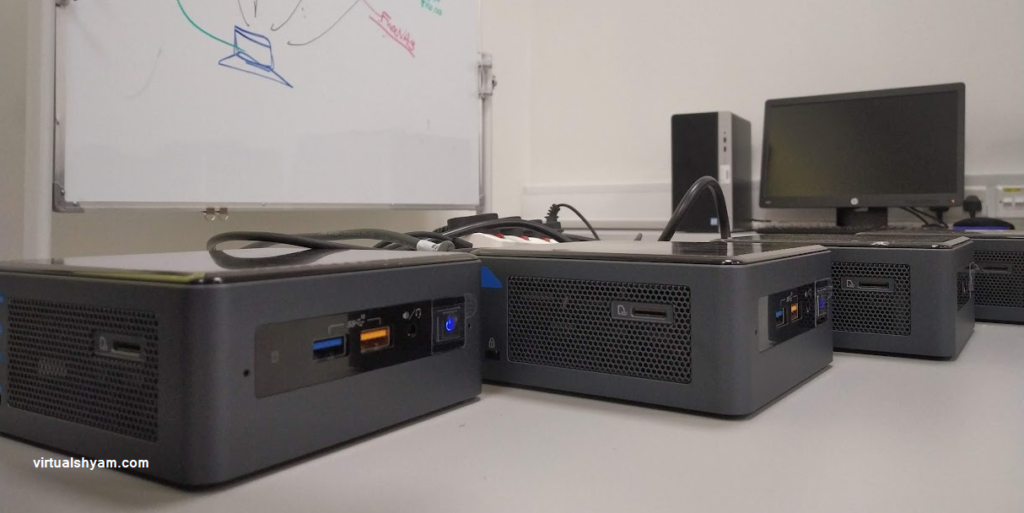
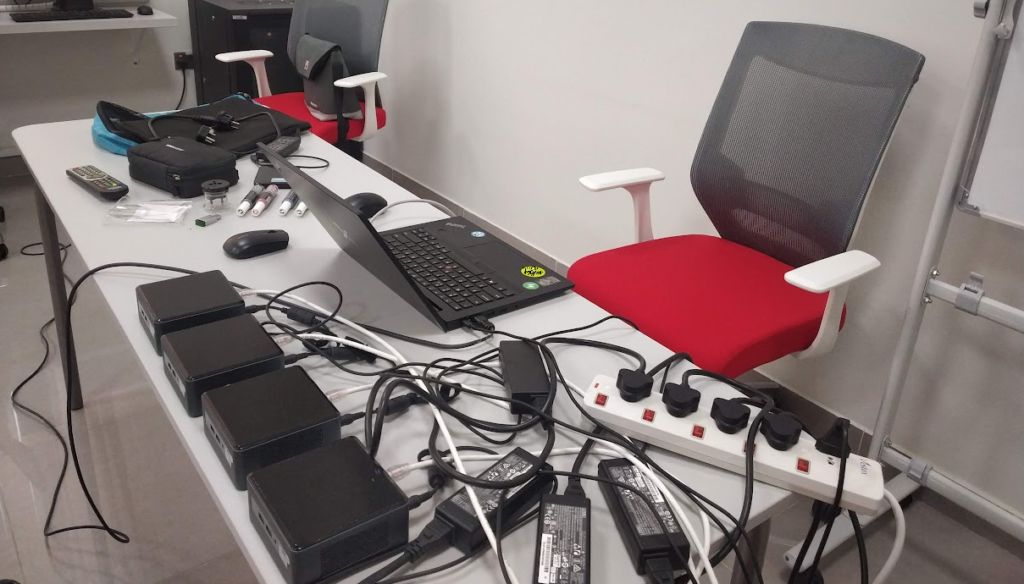
Intel NUC is a great lab machine if you are setting up your home lab or test environment. It is compact , consumes less power and portable . You can take it anywhere to setup a complete lab in minutes .
As an instructor and consultant on IT infra , I have a Intel NUC lab with 5 intel NUC machines which are 8th Gen i3 systems with 64 GB of RAM and 2 SSD storage device on each NUC. It runs ESXi 6.7 and on top of which I run nested virtualization of various products including vSphere 7.x .
But when I try to run ESXi 7.0 directly on the systems , the LAN card is not supported on the base image of the ESXi downloaded directly from the VMware website . and I realized that the intel LAN card in the 8th Gen Intel NUC does not support the ESXi 7.0 .
Please follow the steps below to install the ESXi 7 Update 3 on the Intel NUC 8th Gen. I hope it will work with other generations of the product too , including the 11th gen one which is the common choice for many when they purchase new .
Step 1 : Download the ESXI installation image and the VMware Fling Community Driver for LAN card
When you are reading this article , the file name and the version of the product may be different . All the commands I am using in this post is based on the name of the ESXi bundle and the community driver name . So if your file names are different , please make the change in the commands also
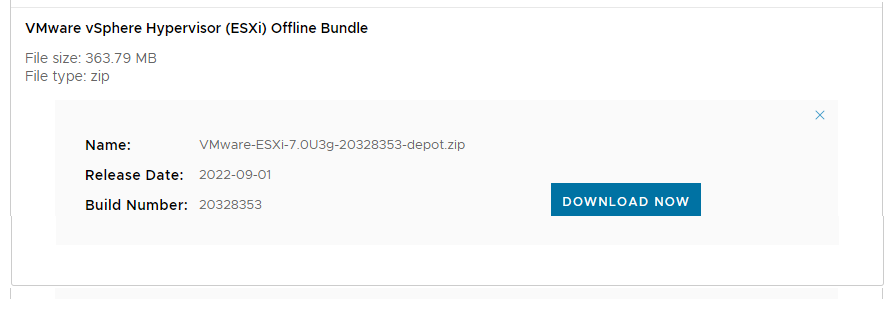
Download the offline bundle by clicking the link below . You will be asked to provide your VMware customer connect login info .
Name of the file is VMware-ESXi-7.0U3g-20328353-depot.zip .
Now download the VMware Fling Community driver for LAN card . Please download by clicking this link
Name of the file is Net-Community-Driver_1.2.2.0-1vmw.700.1.0.15843807_18835109.zip
If there is a change in the name of the files as you read this , Please note that it will get reflected on the command options described below.
Step 2 : Add Community driver to the Installation image file
Use VMware vSphere PowerCLI to add the community driver to Image . If you have not installed the PowerCLI yet , download the PowerCLI from here and install it .
When you run PowerCLI for the very first time , open PowerCLI with administrative privilege , ie right clik the powerCLI icon and select run as administrator . You will be greeted with the following error screen
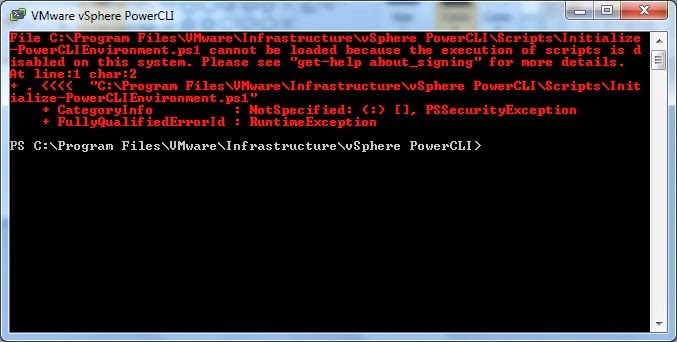
it is now time for us to set the execution policy of the PowerCLI to ” remoteSigned ” it will allow us to run scripts that have written on the local computer . That is exactly what we need to do . The default mode is restricted and that is why we are getting all those red colored scary messages . so go ahead and type this
set-ExecutionPolicy Remotesigned
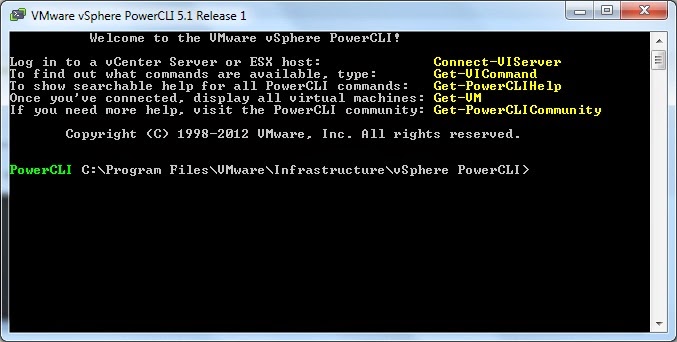
next time when you bring the powerCLI up , it will greet you in a much more pleasant manner . Remember that you don’t have to run it in administrative mode anymore for normal operations .
Now you are on the power CLI prompt . Change to the drive and directory which contains the files both the offline bundle and community driver . for my case I stored it on D:\ESX . so type D: and when you reach D drive , change to ESX folder by typing cd ESX
Now run the following commands , You can even copy paste the commands if the file names matches the version you downloaded , else make changes to the file names mentioned in bold letters
Add-EsxSoftwareDepot .\VMware-ESXi-7.0U3g-20328353-depot.zip
Add-EsxSoftwareDepot .\Net-Community-Driver_1.2.2.0-1vmw.700.1.0.15843807_18835109.zip
New-EsxImageProfile -CloneProfile "ESXi-7.0U3g-20328353-standard" -name "ESXi-7.0U3g-20328353-standard-NUC" -Vendor "Virtualshyam.com"
Add-EsxSoftwarePackage -ImageProfile "ESXi-7.0U3g-20328353-standard-NUC" -SoftwarePackage "net-community"
Now export the file to a ISO file by using the following command
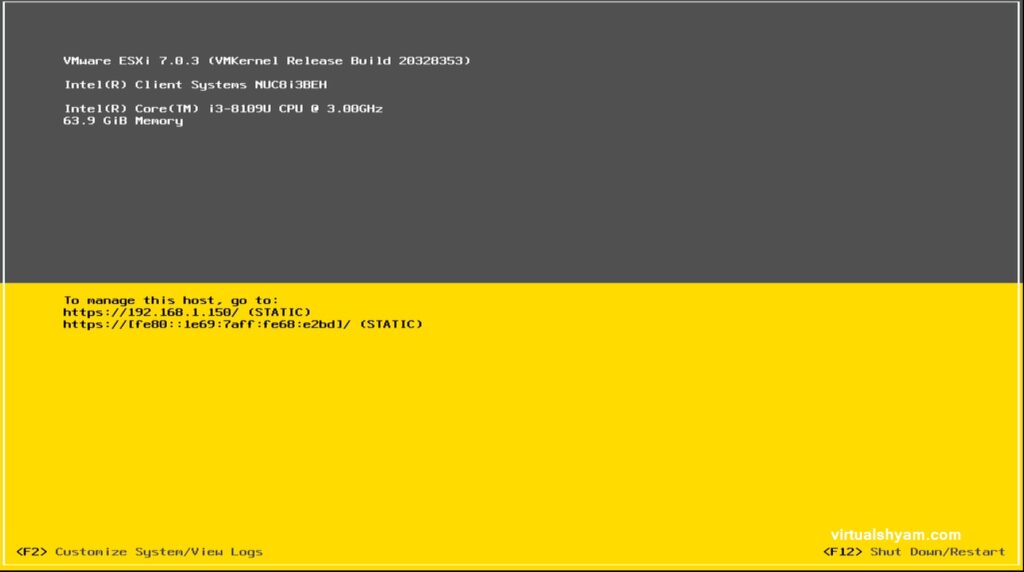
Export-EsxImageProfile -ImageProfile "ESXi-7.0U3g-20328353-standard-NUC" -ExportToIso -FilePath ESXi7U3withCommunityDriver.iso -NoSignatureCheckNow you have as ISO file which is a bootable ISO for installation of the ESXI 7 U3 on Intel NUC or any machine which support VMware Fling Community Driver . Use any tool to create a bootable USB drive . My software of choice for the same will be Rufus .
This is the final result for me . Hope your installation also went well . Please comment here if you find this tutorial helpful . You can also reach me on [email protected]
Very useful information.
Thank you – really helpfull
It a real time scenario information. Greatly appreciate your efforts to provide clarification. A vital information. Thanks shyam sir.